Supercharge Your Dev Team
  Secure Your Dev Team
  GitKraken Desktop
 GitLens for VS Code
 GitKraken CLI
 GitKraken.dev
 GitKraken Browser Extension
 Git Integration for Jira
 Pricing


My name is Luca Del Puppo, I’m a FullStack Developer in Claranet It. I have been a software developer since 2013. I have a background in c# with .net framework, but lately, I’ve moved to Node and React. I’m working for a consulting company, and typically I try to use my experience to help customers to get rid of their problems, remove roadblocks, and achieve their business goals.
Creating a PR, or pull request, is a common action for software developers and often requires them to repeatedly switch between their editor and GitHub. This article will teach you how to prevent these boring time-consuming context switches by handling your PRs directly from VS Code. Let’s get started!
Required Tools
You’ll need these 3 *free tools to follow along with this article:
- VS Code: the most popular editor on the earth at this moment
- GitLens: My absolute favorite extension for VS Code to work with Git and to get repository info quickly
- GitHub Pull Requests and Issues: a VS Code extension for handling PRs and Issues directly
*GitLens does have paid features in GitLens+, but you won’t need the paid version to follow along with this process.
Create a Branch
The first step is to create a branch. While, you can accomplish that via the VS Code terminal, but you can also use GitLens and I much prefer that path.
To create a branch using GitLens follow these steps:
Select the GitLens icon from the VS Code Sidbar and the result should look something like this:
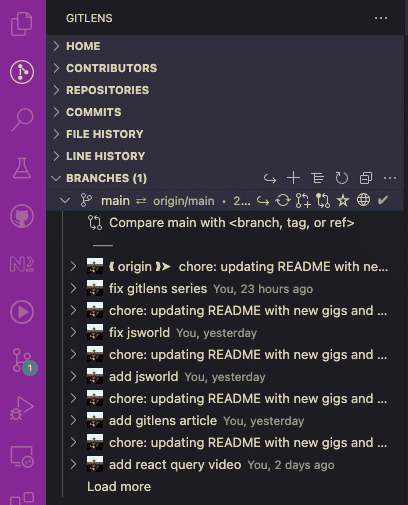
From this panel, there are a variety of options to work with your current repository, but for now we’ll focus on the Branches section.
In this example you can see the main branch and its commit history. It’s the only branch in the repository at the moment. There are many icons on the right of the branch; each represents a shortcut for an action including switch branch, fetch, create PR, etc.
To create a new branch, go over the source branch with the mouse, right-click, and click the option “Create Branch…”
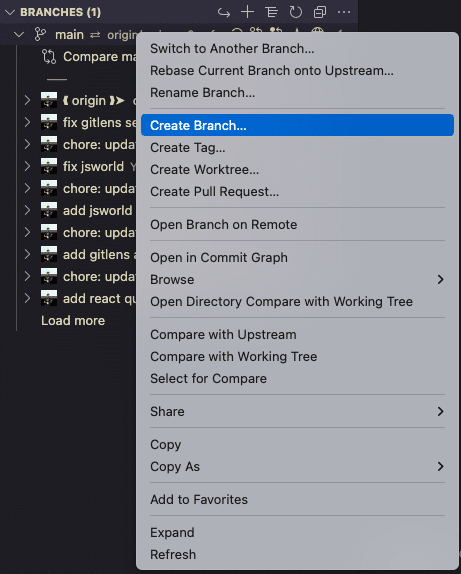
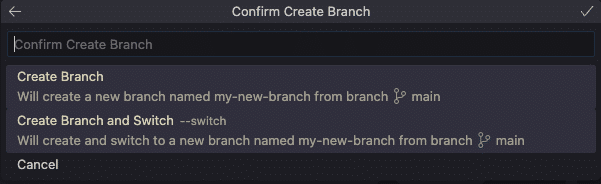
Now, VS Code opens a new command palette, where you’ll be prompted to type the name of your new branch. Once you’ve entered your desired branch name, press Enter and a new palette with the following three options will appear:
- Create Branch
- Create Branch and Switch
- Cancel

Choose Create Branch and Switch and press Enter again.
Now you can change your code based on your preferences. When you’re ready to create a pull request jump to the next paragraph.
Creating a Pull Request
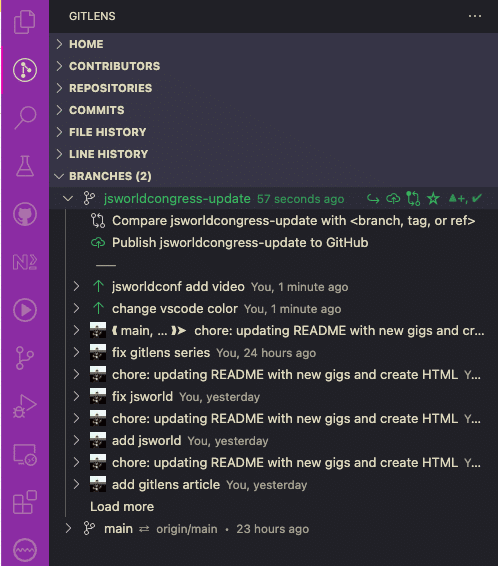
In this example, I’ve created two new commits on my newly created branch. You’ll also notice from the image above that the new commits have a different icon (an arrow) because the branch is only local and hasn’t yet been pushed to the remote. Finally, you can see that the branch’s colour is green for the same reason, it hasn’t been pushed.
Before creating your PR, you should push your branch to the remote using the option “Publish <your-branch-name> to GitHub” or using the publish icon (the second icon on the right of your branch that looks like a cloud). Both options push your branch to the remote, so choose the option that you prefer.
Now, it’s time to create the PR.
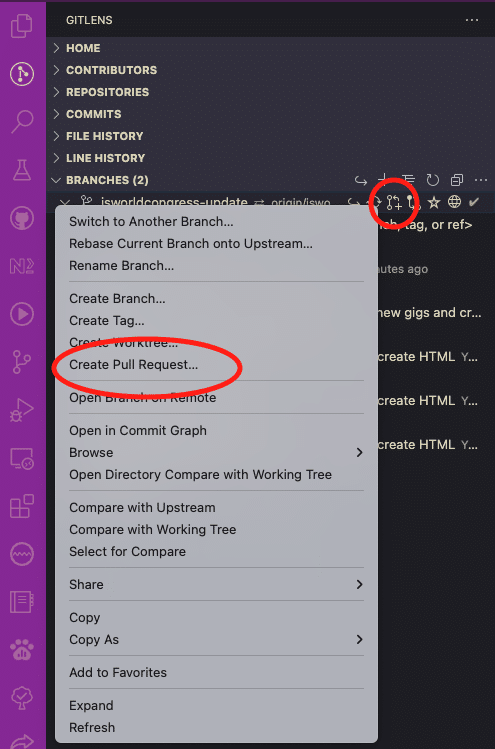
There are two ways to achieve this step:
- Right-click the branch and choose the option “Create Pull Request…”
- Click the third icon on the right of your branch
Again, choose the best one for you. Both options will result is a new VS Code palette with two options:
- Create Pull Request on GitHub (Built-In)
- Create Pull Request (GitHub Pull Request and Issues)
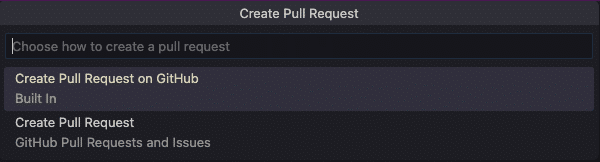
In this case, select option 2, Create Pull Request with the GitHub Pull Requests and Issues extension.
The result is a new view in VS Code, where you can manage your PR.
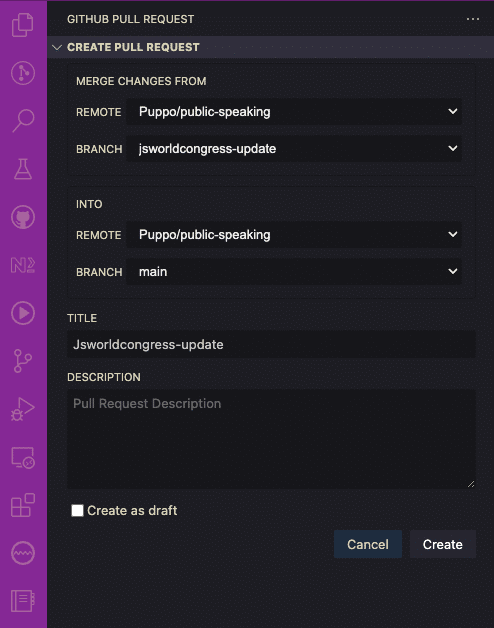
Select the PR’s branches (source and destination) and type the title and description. You can also check the draft option if you want, but that’s only enabled if you have a pro subscription to GitHub.
Now, you can create your PR by clicking the “Create” button in the bottom right.
This will bring up a new view with additional options to handle your PR.
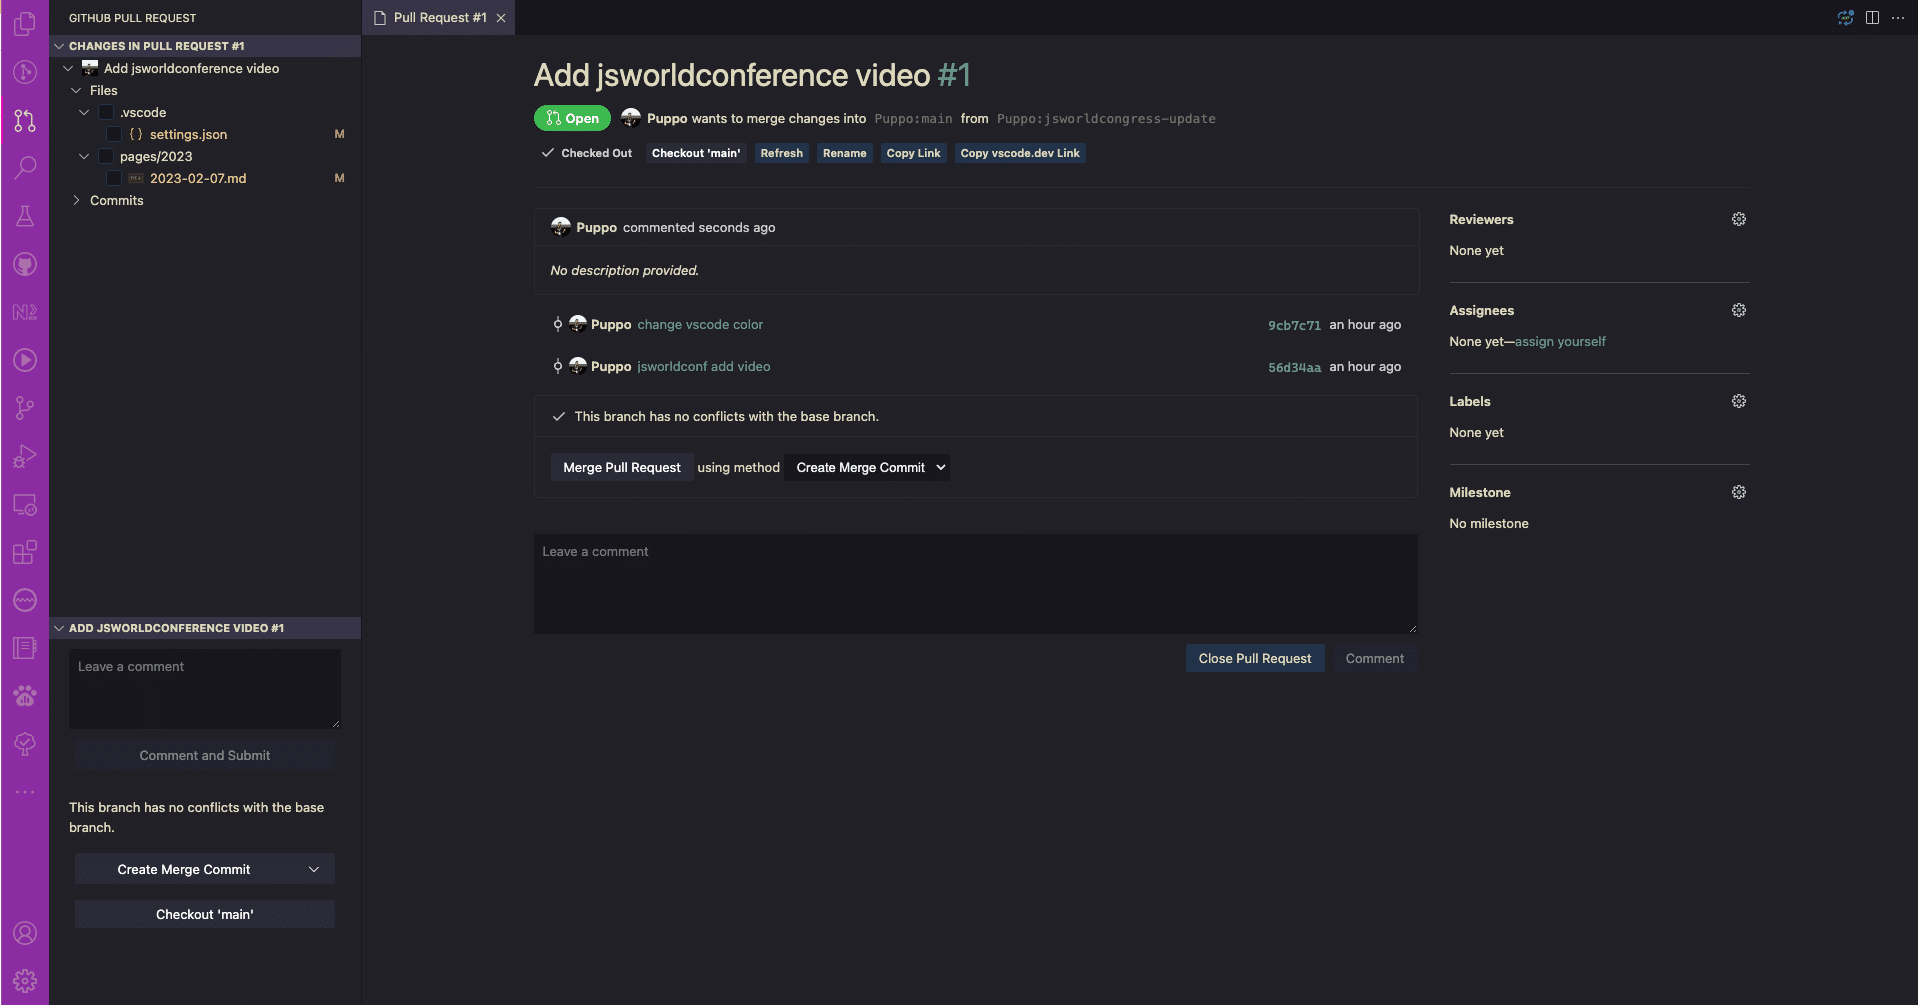
On the left, you can see your PR, and if you expand it, you can check the commits and all the files affected in the PR; you can click the files and view the diff too.
On the right, you’ll see a page similar to the GitHub PR page on the web where you can edit the title, set reviews and assigners, add labels or milestones and so on.
Merging Your Pull Request
Now that you’ve created the PR, let’s take a look at how to merge and close it.
You can see all your PRs directly from the extension. Sidebar → GitHub Extension and you can find different PRs’ groups: Local, Waiting, Assigned and so on.
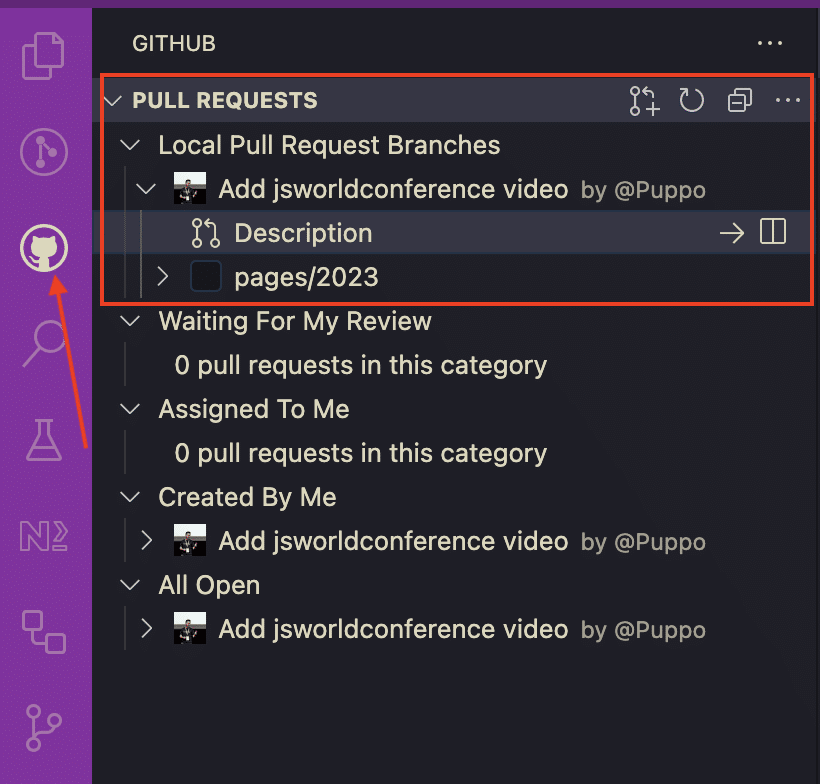
When you have selected the PR to close, you must click the Description section to open a new Tab in your VS Code editor.
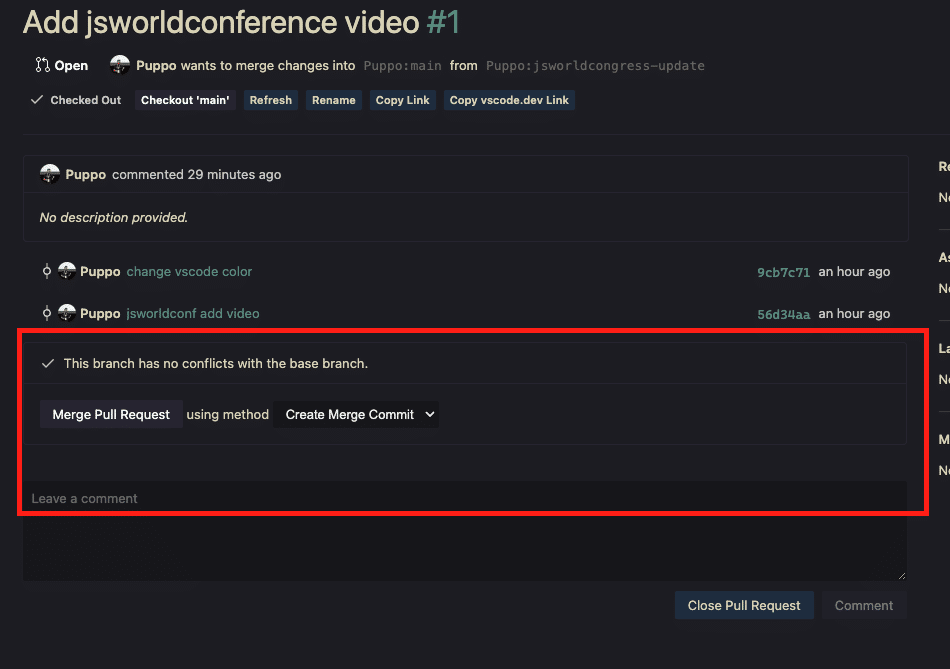
In the center of the PR view, there’s a section related to closing the PR. Select which type of merge method you prefer and then click the “Merge Pull Request” button.
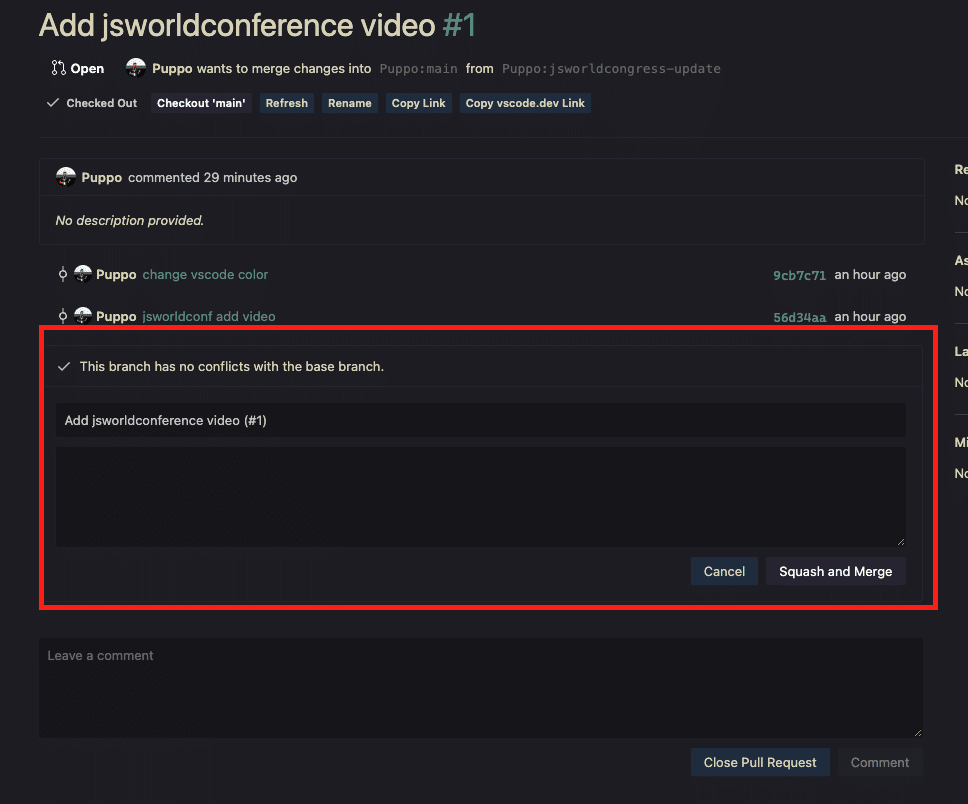
Finally, edit or confirm the PR title and description and then click the button to confirm the merge.
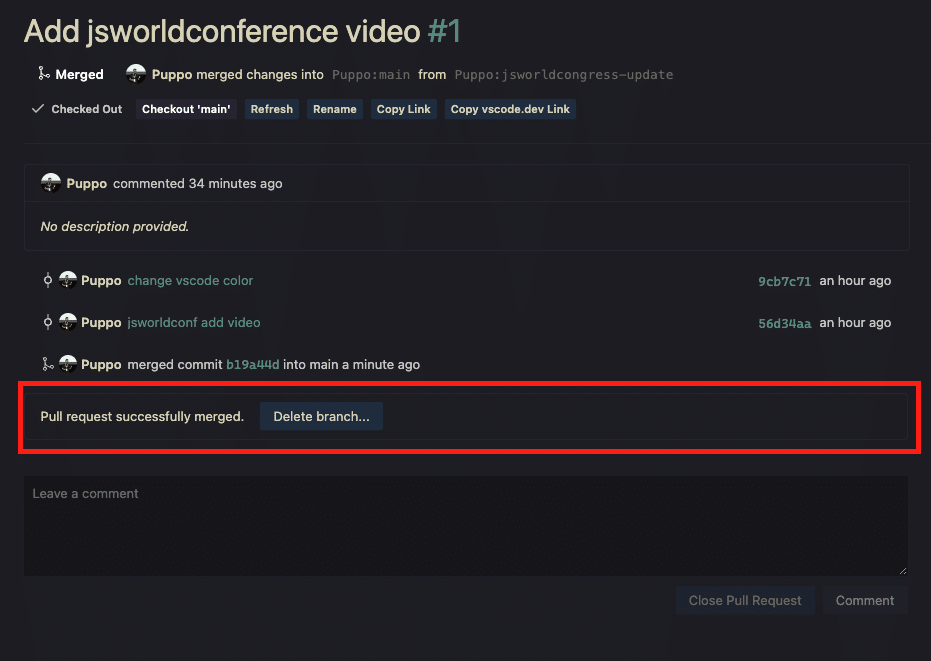
Voila, your PR is closed and merged in your main branch.
Now, you can delete the branch by clicking the “Delete branch…” button. You’ll be given the option to select which branch you want to delete, local, remote, or both. This is a crucial step in maintaining good repository cleanliness and is especially important when collaborating on a team.

Congratulations, you have completed this short tutorial 🚀👏
Now that you’ve followed the steps above, you can confidently handle future PRs in VS Code using GitLens and GitHub Pull Request & Issue extensions.
P.s. don’t forget to rate GitLens & GitHub Pull Requests and Issues extension if you like them ⭐