This article was written by a guest author.
Updated: 6/22/2022
Put simply, Git Bash is an application for Microsoft Windows OS environments that provides Unix based shell utilities and experience for Git command line commands. Git Bash emulates the Git command line experience that Unix environments have, for Windows users. Most Windows users download Git Bash when they first install Git for Windows.
As a version control system, Git was originally delivered within Unix style command line methods. MacOS & Linux Operating Systems have a built-in terminal shell that supports Unix-based command line features whereas Microsoft Windows’ Operating System command line prompt is not a Unix-based terminal.
Because the Windows command line does not support Unix-based commands, Git CLI features are mostly delivered with user-friendly GUI applications in the Windows Operating System.
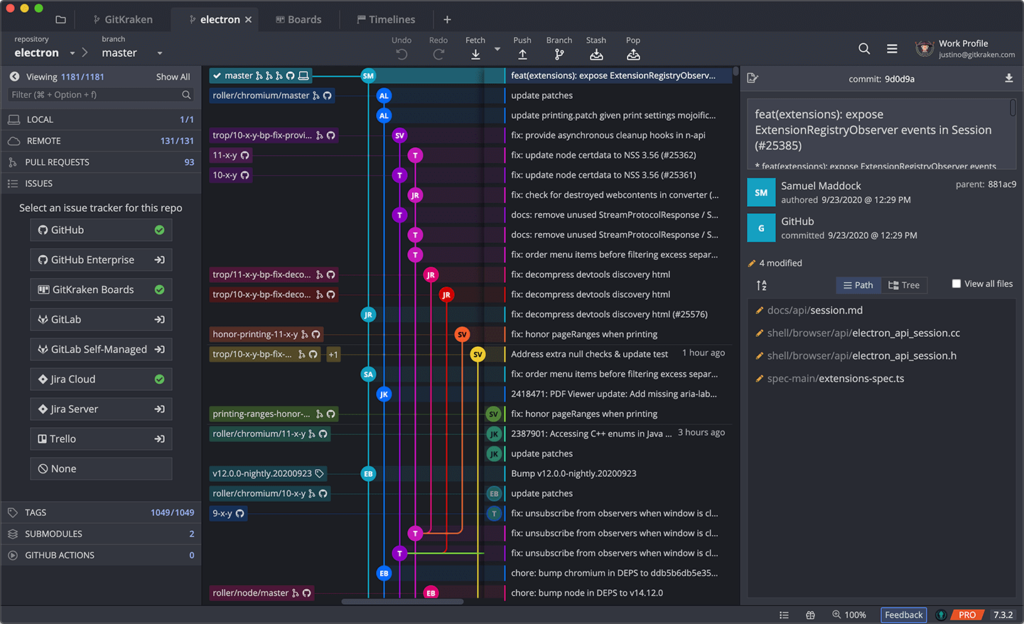
These applications provide visual functionalities to the end-user which makes using Git easier. Even some of them, like GitKraken Client, provide drag-and-drop functionalities for common Git commands, so end-users don’t need to know every single command for managing their code base. This makes life easier for beginners at the very first stages of Git usage.
As Git experience increases, end-users can prefer using Git command line features for specific commands. Git Bash is one tool that provides command line features in the Windows Operating System to end-users. Another tool that developers can use to interact with the command line on Windows is GitKraken Client’s CLI.
Git Bash Topics Covered
Set Git Bash as Your Default Terminal in GitKraken Client
“@GitKraken Client is one of the best graphical tools to keep track of your code. I used just Bash before. GitKraken Client simplified my life a lot!” – @elenaManele
Introduction to Git Bash
A shell is a computer application that integrates with the operating system and exposes its services to an end-user or other applications. Bash is an acronym for Bourne Again Shell, which is the GNU Project’s shell.
Git Bash is not just a bash package for Microsoft Windows OS. It includes bash utilities, Unix collections like Secure Shell Protocol (SSH), Secure Copy Protocol (SCP), CAT (Unix utility that reads files sequentially, writing them to standard output), and other Unix-based collections compiled for Windows and Git features.
Git Bash provides a package for Git usage from the command line for Windows users, but GitKraken Client will make those same actions faster and more intuitive.
Some things absent from Git Bash that users can enjoy in GitKraken Client are auto-suggest and auto-complete for Git commands. Just start typing a command in the terminal tab and you will see relevant command suggestions with descriptions. Simply select the command you’re looking for and hit enter to automagically complete the Git action!
GitKraken Client’s magical auto-complete and auto-suggest for Git commands will help you accelerate your keyboard-driven Git workflow and increase your productivity.
Git Bash Download
Git Bash can be installed as other Windows applications, but you need to first download the executable file from the Git Bash download page and then follow the installation steps.
1. Open your favorite browser and go to the Git Bash Download page on Git-scm.
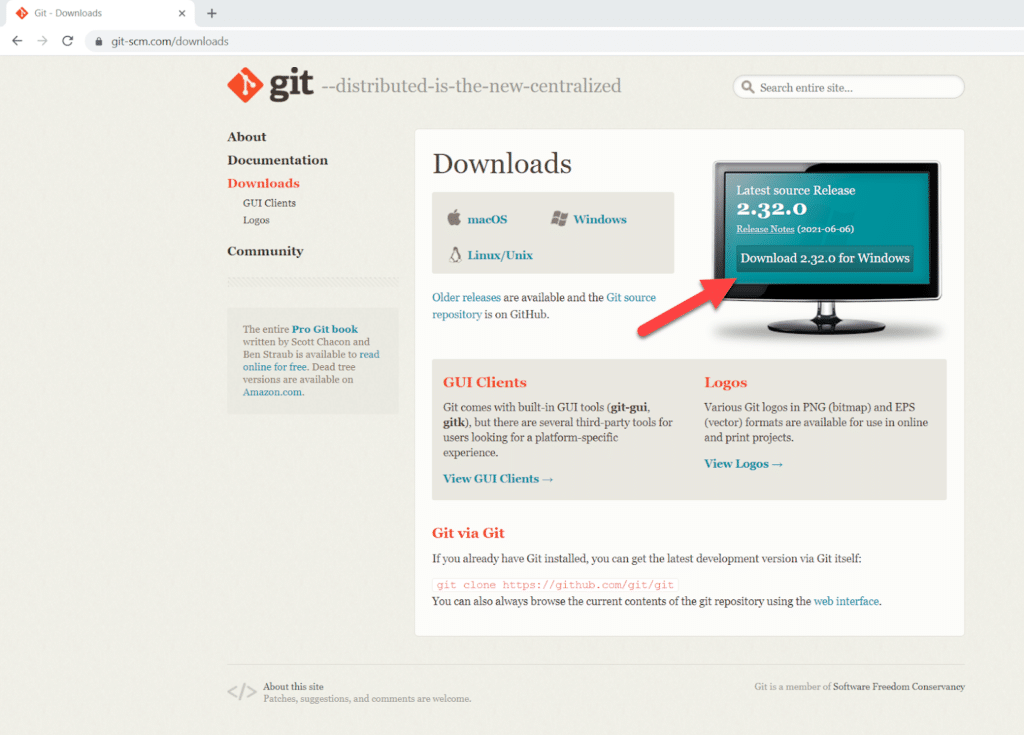
2. After successfully downloading the Git Bash executable file, follow the installation steps described in the below embedded video. Some hints are also listed in the video for the related installation step.
3. Voilà! Git Bash is ready to be used on your local Microsoft Windows platform.
*If you used the above process to download Git Bash and Git for Windows for the first time, you may find instructions for configuring Git after your Git download useful. You’ll need to configure Git before you can access all of Git’s capabilities and features.
Using Git Bash with GitHub
In this section, we will look at how to run Git Bash and see some basic Git Bash commands required for Git integration. As Git Bash is a command line utility for Git on the Microsoft Windows platform, a basic Microsoft Windows command prompt (CMD) knowledge will be useful before getting started with Git Bash as they are very similar. If you do not know how to use CMD features, you can just take a look at the Windows Commands Reference from the Microsoft related web site.
Now, let’s look at an example of using Git Bash with GitHub. You will start by linking your GitHub account with Git Bash to start configuring your GitHub repositories. If you do not have a GitHub account, you can create one directly from the GitHub home page.
You can also refer to GitHub Docs for a very large and illustrative documentation about GitHub usage.
Git Bash Commands
Before going into steps on how to configure Git Bash and how to use it, you need to have a repository on GitHub. If this is your first time creating a repository on GitHub, checkout the related GitHub documentation for instructions on how to create a repository on GitHub.
Now, let’s start configuring Git Bash with your GitHub account from scratch (examples in this article will be given from my personal GitHub account).
1. First step is to run Git Bash. Double click the Git Bash icon on your Windows desktop to open your Git Bash interface.
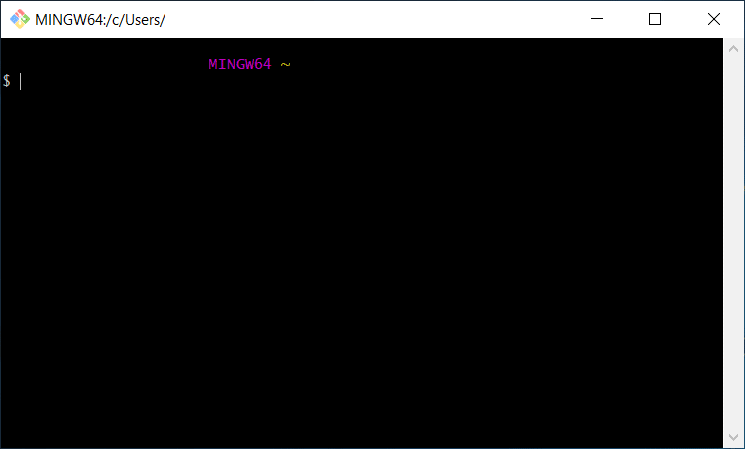
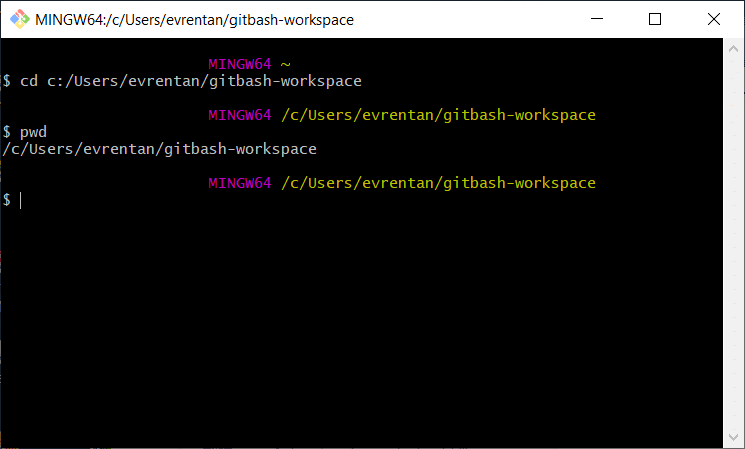
2. Use the cd Git bash command to change your active directory with your local repository workspace. cd and chdir in Windows CMD are aliases for setting the active directory.
Now your active directory is your local repository. You can validate your active directory with the pwd command.
3. This step is related to configuring your GitHub email and GitHub username. Type the below commands to link your GitHub email & GitHub username.
git config --global user.name "%yourGitHubUserName%"
git config --global user.email "%yourGitHubUserEmail%
a. Now, you can clone the “git-bash-intro” repository to your local workspace. First, get the clone link from your GitHub repository as shown below:

b. Then, type the below command to clone your repository. You will use the clone link that you just copied from your GitHub repository.
git clone "%yourRepositoryCloneLink%"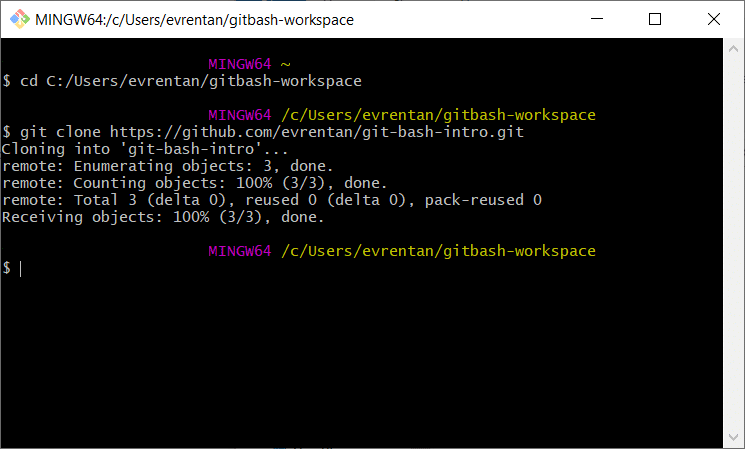
There are two important tips while cloning the Git repository. First: if you create a private repository, you also need to have related GitHub permissions. In this Git Bash example, the git-bash-intro repository was initialized as public. You can check the repository visibility section from GitHub Docs for more information about GitHub repository permissions.
Another helpful tip is that you may face the below error while cloning a repository:
fatal: could not create work tree dir 'git-bash-intro': permission denied
This error states that you do not start Git Bash with the required permission to execute changes on your local Microsoft Windows platform. You can run Git Bash as administrator to resolve.
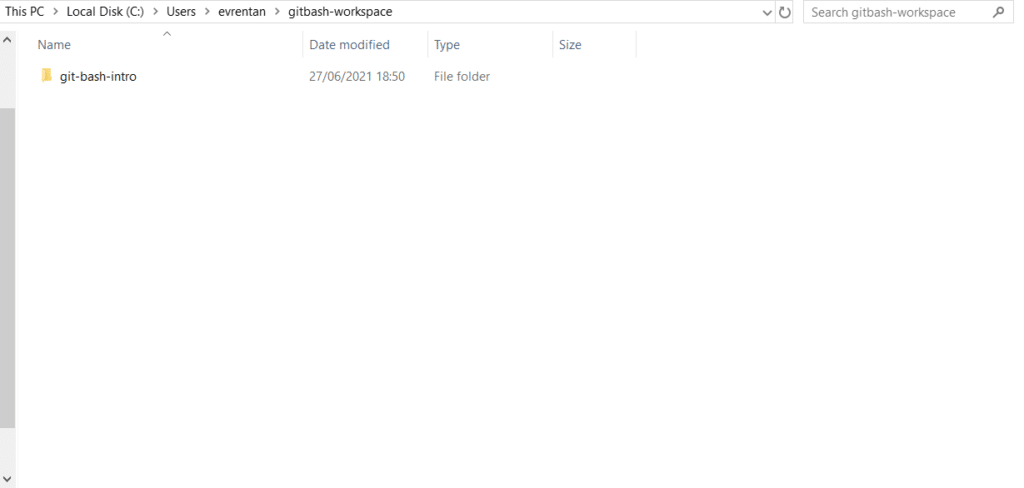
4. Next, you will clone a repository to your local workspace to create a folder with the same name as your GitHub repository.
5. Add a new text file called “firstCommit.txt” in your git-bash-intro local repository.
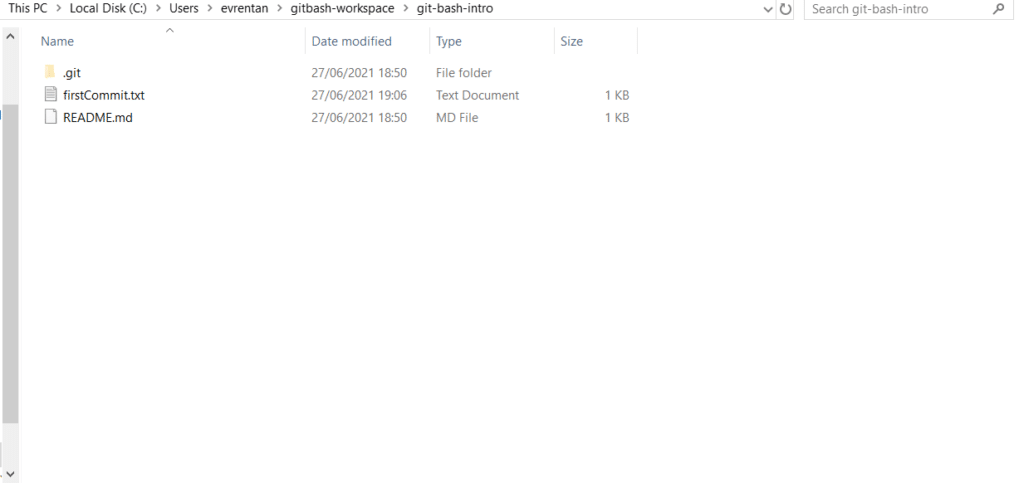
6. It is time to reflect your local changes to your remote GitHub repository. Here, you will need to run a set of commands to push changes to your remote git-bash-intro repository.
git add .

git commit -m "first commit"

git push origin master
Now, let’s check what these Git bash commands mean:
- git add: This command adds content to the git index and updates the index with the local working tree. You can use “.” to add all working tree contents, or you can explicitly mention which content you want to add.
For instance; you can use “git add firstCommit.txt” in order to add just `firstCommit.txt` to the index.
For more details, you can visit the git-add documentation page on Git-scm.
- git commit: This command creates a new commit instance with the current content(s) of the index and with the log message describing the changes.
For more details, you can visit the Git Commit page in the GitKraken Learn Git center.
- git push: This command updates the remote refs with the local refs. In this example, we will update the master branch in our remote repository with our local changes.
For more details, you can visit the git-push documentation page on Git-scm.
- git pull: This command will pull all changes from a remote repository branch to your local repository branch.
For more details, you can watch the beginner Git tutorial video: What is Git Pull?.
7. Confirm the remote repository is in the GitHub account. Sure enough, the new file “firstCommit.txt” is there!
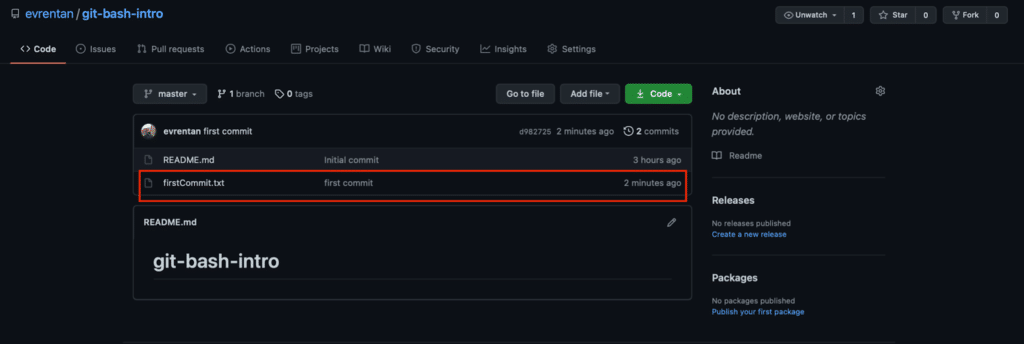
Now that you have received this Git Bash introduction, you can easily adopt these steps to your own projects as you integrate Git Bash with your GitHub account and use the Git version control system for your code base.
Alternatively, the process of integrating your command line terminal with Windows using GitKraken Client is much easier and takes far fewer steps. Simply download GitKraken Client on your Windows machine, open a new tab, and click New Terminal Tab. Then start typing your commands to get to work – seriously, it’s that easy!
Using GitHub with GitKraken Client
In comparison to using GitHub with Git Bash, in GitKraken Client, you can leverage the full power of the robust GitHub integration by simply signing into GitKraken Client using your GitHub credentials. From there, it’s just a few short steps to generate an SSH key and add to GitHub, and clone or fork a GitHub repository. Learn more about how developers use GitKraken Client with GitHub for a seamless Git workflow, including creating GitHub pull requests.
Set Git Bash as Your Default Terminal in GitKraken Client
Git Bash is a life saver for Windows users who want to leverage the power of the Git command line for their version control. It is easy to install Git Bash and start using it as stated throughout this article.
And even better, with GitKraken Client, you can combine the power of Git Bash with visualization tools—like the commit graph, diff view, file history and blame, to unlock even more productivity.
To use Git Bash as the default shell for GitKraken Client’s built in CLI, perform the following steps:
- Select Preferences, represented by the gear icon, from the top toolbar
- From the left navigation, select Terminal
- Select Default Terminal
- From the subsequent dropdown menu, select Git Bash
You’re all set! Enjoy the power of Git Bash and the convenience of powerful visualization features, combined into one luxurious tool: GitKraken Client.

Git Bash FAQ
Q: How to Paste into Git Bash?
To copy text in Git Bash, hold Shift and use the left/right arrows to select the desired text, and hit Enter. To paste into Git Bash, press Insert on your keyboard.
Q: How to Update Git Bash?
A: Updating Git Bash can be accomplished simply by updating Git for Windows. From a command line, run git update-git-for-windows.
GitKraken Client has revolutionized Git! Get a keyboard-driven, Git-enhanced terminal experience with powerful visualizations like the commit graph to help you accelerate your workflow.
 GitKraken MCP
 GitKraken Insights
 Dev Team Automations
 AI & Security Controls