Supercharge Your Dev Team
  Secure Your Dev Team
  GitKraken Desktop
 GitLens for VS Code
 GitKraken CLI
 GitKraken.dev
 GitKraken Browser Extension
 Git Integration for Jira
 Pricing
The Git push command takes the changes you’ve made on your local machine and updates your remote repository to reflect those changes. Developers use this command to update their remote repository in order to share the most accurate Git history with project collaborators.
Git push is the command of choice for updating remote repositories. Not only does it take your local changes and add them to the remote, Git push does not overwrite any of the Git history previously held on the remote.
However, there are some situations when you will need to overwrite your remote history. This is where Git push force comes in, which you may have heard referred to as “Git force push” or “force pushing.”
Read on to learn how to leverage Git force pushing effectively and safely in your workflows. In this article, we will cover how to force push using GitKraken Client, first in the CLI and then in the Git GUI.
GitKraken Client minimizes the risks of possibly dangerous actions in Git, like force push, with features like the Undo/Redo button. Want more security in your workflow? ⬇️
How does Git Push Force Work?
Unlike Git push, git push –force does not require your local repository to be fully up-to-date with the remote repo. Quite the opposite, Git push force makes the remote repository match your local repo.
The Risks of Git Push Force
Git push force overwrites the remote repository to match exactly what your local repo looked like when you ran the command. This means you need to make sure your local repository is entirely up-to-date with the latest changes from the remote before running Git push force or you risk losing commits.
For example, let’s say a team member pushed new changes to a remote and you forgot to pull them. Because you have failed to pull those changes, they are not reflected in your local repository. In this case, if you perform a Git push force, you will replace the remote repository with a copy of your local repo, effectively deleting your team member’s work.
Using Git push force still isn’t just as easy as making sure you pull or fetch the latest change before running the command. It’s possible that one or more of your team members are working on changes based on the old commit history. If you force push in this situation, it could make your team members’ contributions obsolete if you haven’t merged them into your current work.
If you determine that you want to keep your project’s history but still want to make a minor change to your remote repo, consider reverting your commits using git revert <commit>. This doesn’t alter your project’s history the same way force pushing does, and can help you undo commits that conflict with your codebase.
When Should I Use Git Push Force?
There are a few situations where using Git push force is the best course of action despite the potential for negative repercussions.
Some common examples of when you may need to force push in Git include:
- After you Git rebase a branch locally
- After squashing commits that have been pushed to the remote
- After sensitive data has been accidentally pushed to the remote and needs to be removed
If you’re new to Git and are feeling unsure about using the terminal, the GitKraken CLI offers autosuggest for Git commands based on your activity, and even provides a brief description of what they do.
Git Push Force with the Command Line
While you can follow the same basic steps to force push in any terminal, we’re going to go over the process using the powerful GitKraken CLI.
To access the CLI in GitKraken Client, click the Terminal button in the top toolbar.

You’ll want to start by fetching any changes from the remote with git fetch --all. Performing a Git fetch grabs any changes from the remote that haven’t already been applied to your local repo and adds them.
While this step is not necessary to execute a force push, it is a good practice as it allows you to verify that nothing has been recently pushed up that you don’t want to overwrite.

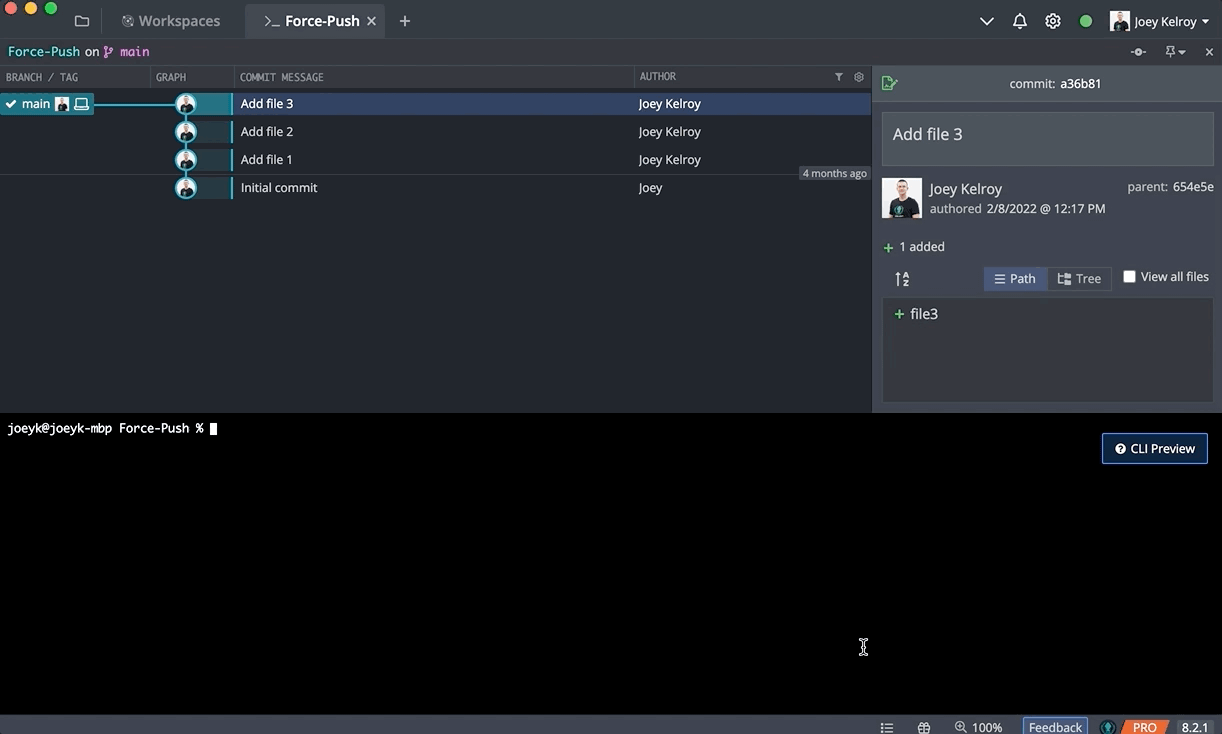
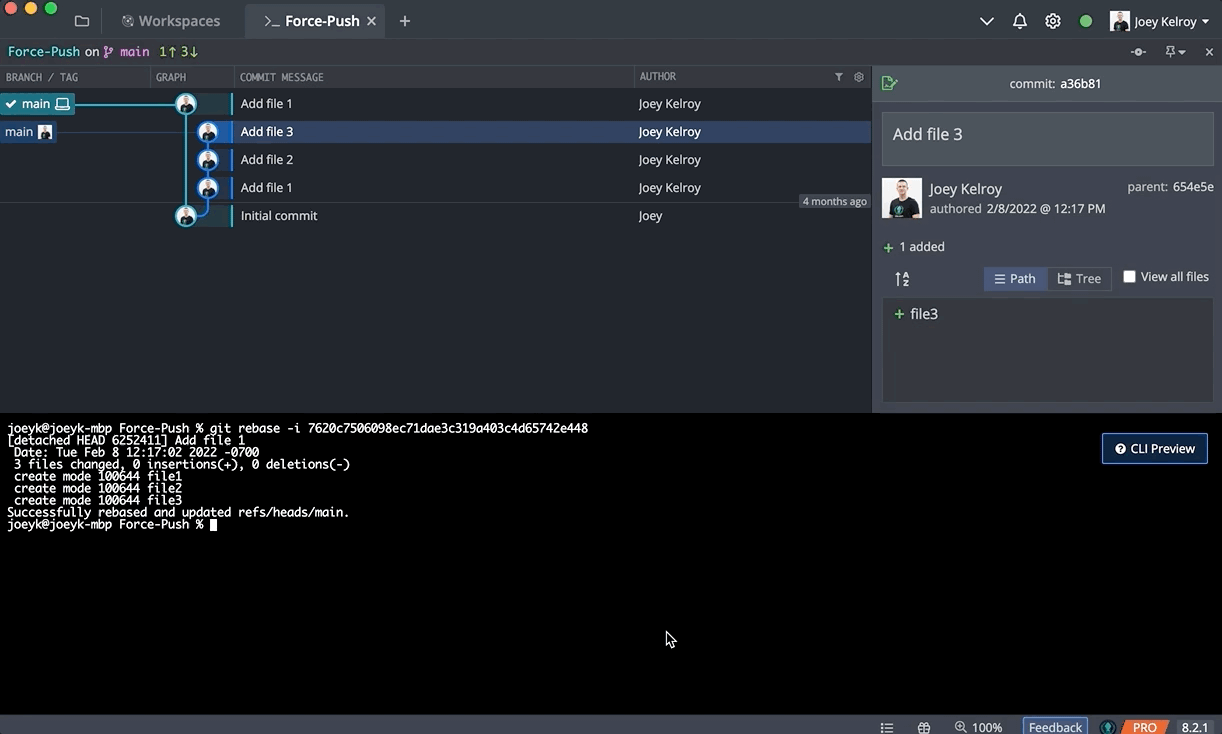
Next, you should perform an interactive rebase to squash your commits. This practice promotes cleaner remote repositories and makes it easier for your team members to find and interact with your changes. To perform an interactive rebase and squash a group of commits:
- Use
git logto find the SHA of the base commit you’ll be working from. - Run
git rebase -i <SHA>to start the interactive rebase. - Using a text editor program like Vim, select the commits you would like to squash.
- Quit the text editor using the Escape key and then type
:wq. - Finally, compose a comprehensive commit message based on all the files and then use Escape and
:wqto finish.
As a general best practice, you may also want to run git status to confirm that your local branch is in the expected state. Running Git status will return differences between the index file and the current HEAD commit as well as the differences between the index file and the working tree.
Once you’ve taken those steps to create a safer environment for a Git push force, you can now run the following command to force push to the remote repository:
git push --force
Another safety measure to consider from the CLI is using git push force-with-lease. Using this flag will fail to force push if it identifies that changes have been made to the remote that are not reflected in your local repository.
Think back to our past example. If a team member has made changes to the remote and you haven’t pulled those changes, running Git push force alone will overwrite your team member’s contribution. However, if you run Git push force with lease, the force push will fail because it identifies that you need to pull changes from the remote. If no changes have been made to the remote since your last pull, the force push will proceed.
Git Push Force with a Git GUI
Just like if you were to use the CLI, before executing a force push in a Git GUI, you will want to perform a fetch first. You can do this in GitKraken Client by selecting the small ^ arrow just to the right of the Pull button from the top toolbar. From the subsequent dropdown menu, select Fetch All. As mentioned before, performing this action first can help mitigate the risk of accidentally overwriting work.

Once you’re satisfied with your local repo, you can push your changes to the remote using the Push button. When force pushing with GitKraken Client, a banner will appear with the following options: Pull (fast forward if possible), Force Push or Cancel.
Note: Pull (fast forward if possible) fetches any updates on the remote branch and attempts to fast-forward, or move, the local branch to point to the same commit as the remote. If a fast-forward is not possible, a Git merge will be performed. Cancel will cancel the push.
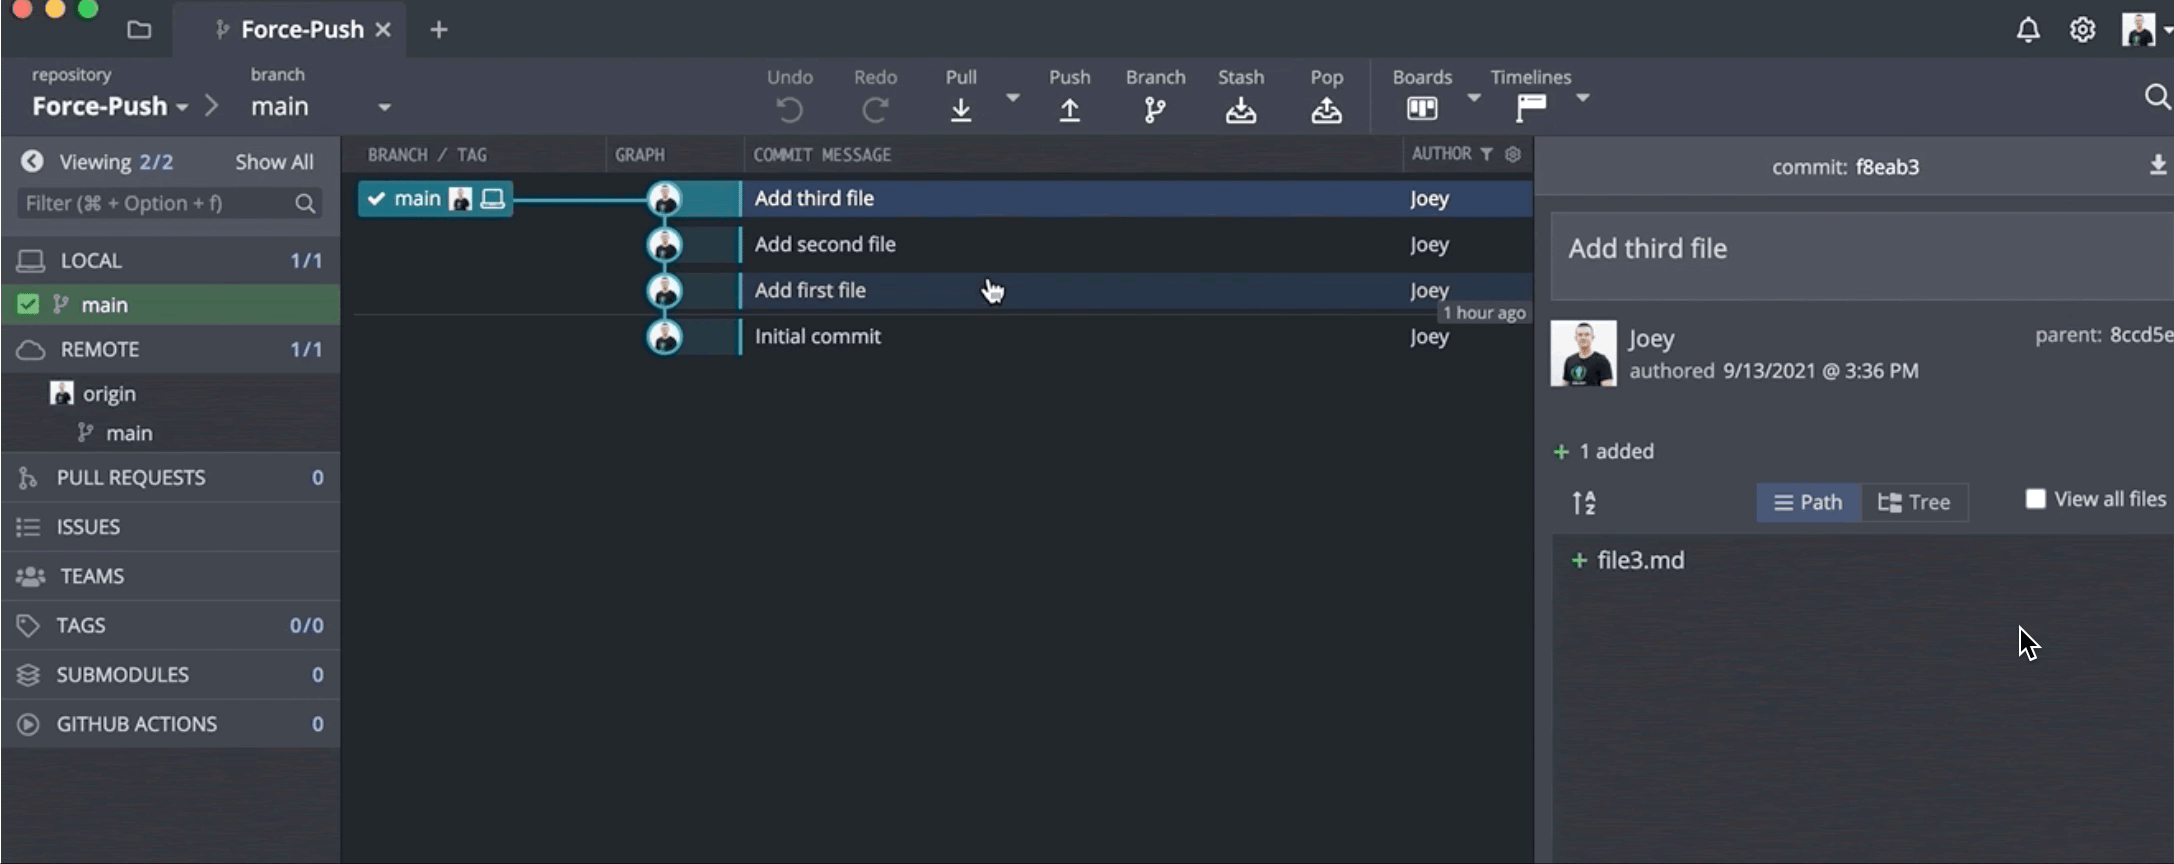
In the below example, there are a few commits that have been pushed that should be squashed. To do this, use command/ctrl to multi-select the desired commits from the graph, and then select Squash 3 commits. Notice the local main branch now diverges in history from the remote main branch.
Now that the local main branch is pointing to the desired commit, it’s time to Git force push this change to remove the other commits from the remote history. To do this, select Push from the top toolbar in GitKraken Client. You will then be prompted with the following message:

Select Force Push, and finally confirm by selecting Force Push a second time. Because this is a potentially destructive action, GitKraken Client gives you the opportunity to double check and ensure you want to proceed.
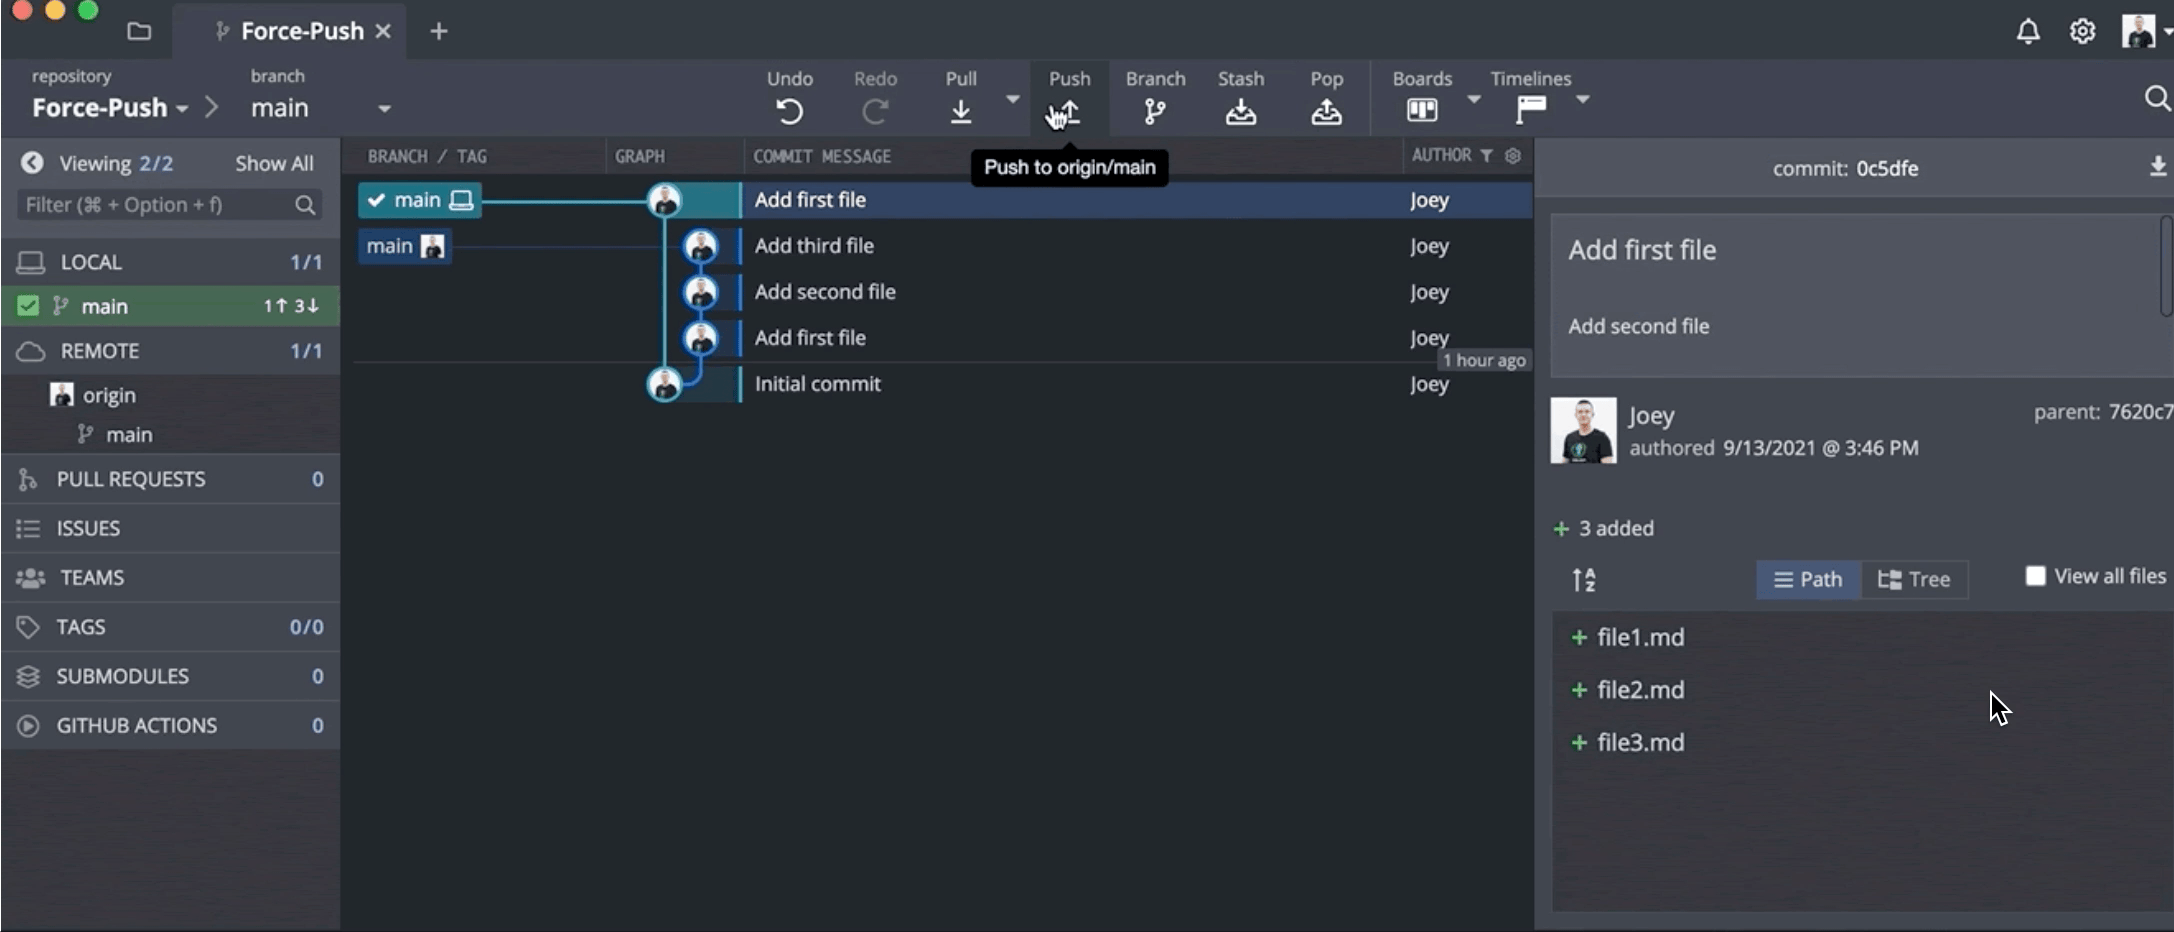
You can confirm that the force push was successful by checking that the local and remote main branch are pointing to the same commit, and the other undesired commit has been removed.
Remote Repo Health and Git for Teams
It’s easy to understand why keeping a clean remote repository is so crucial based on the concepts we’ve covered. The need for a clean remote repository is compounded when working with a team. With so many touchpoints and contributors, it’s crucial to establish clear repository standards and promote as much project visibility with your collaborators as possible.
GitKraken Client’s Git for Teams features alert you if you and a team member are working on the same file so you can avoid potential merge conflicts, and deep linking allows you to quickly share specific parts of a project with your team. GitKraken Client makes team collaboration seamless and easy so you can focus on writing amazing code.
Want to help your team improve the health of their remote repositories, avoid merge conflicts, and increase productivity? GitKraken Client helps you do all of that and more. Download now to take the first step toward improved team collaboration and success.