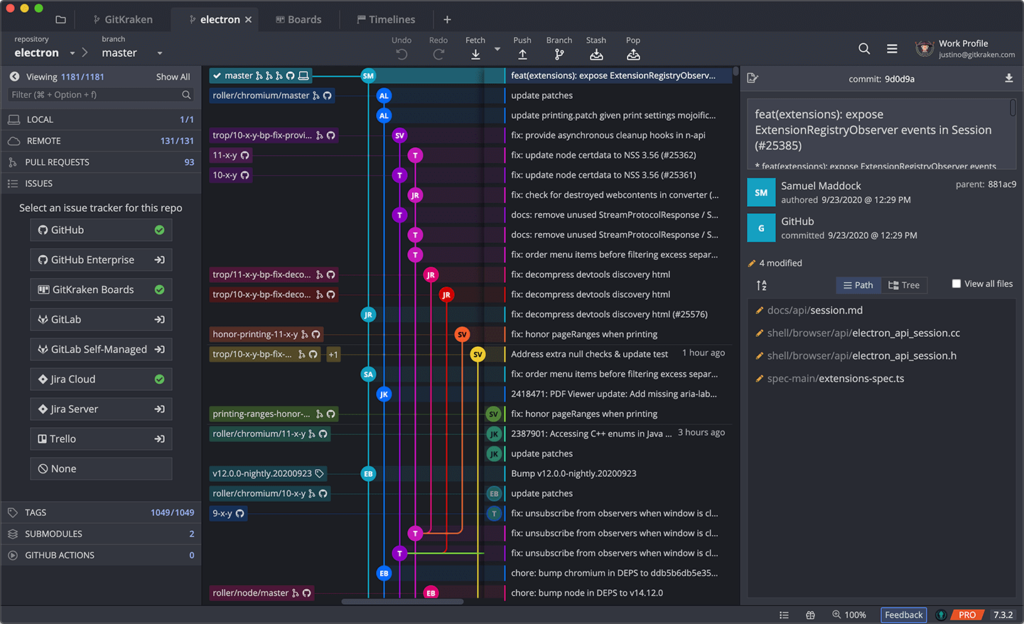
Are you looking to Git push a local branch to a remote? Pushing a local Git branch to a remote will update the remote branch with all commits made on the local branch. Pushing is done to make the local changes accessible on the remote for others to fetch or pull.
In this article, you will learn how to Git push to a remote branch using GitKraken Client, first in the GitKraken CLI before seeing the process in a Git GUI.
Managing and updating your remote projects can be tricky if you’re new to Git. Luckily, GitKraken Client makes it easy by clearly visualizing your local and remote branches, so you know exactly where you’re pushing changes.
How to Git Push to a Remote Branch Using the CLI
While you can follow the same basic steps to Git push to a remote branch in any terminal, we’re going to go over the process using the powerful GitKraken CLI.
From GitKraken Client, the GitKraken CLI can be accessed from the Terminal button in the top toolbar.

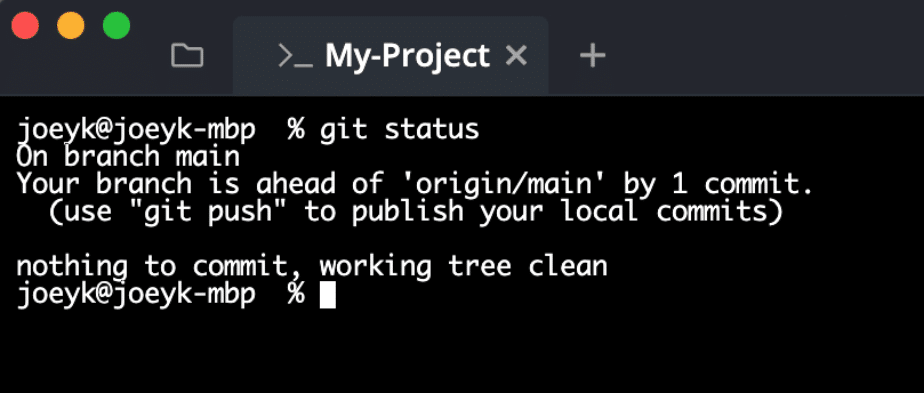
Before you run the Git push action from the CLI, you should first use git status. Running git status will return differences between the index file and the current HEAD commit as well as the differences between the index file and the working tree. This is a great way to double-check your work and make sure that you are ready to push your local changes to the remote.
In the example below, you can see that the local main branch is ahead, or contains one additional commit, of the remote main branch origin/main. This means that there are files or changes contained locally on your machine that cannot be found on your remote and need to be pushed up.
Additionally, you can see the message: “nothing to commit, working tree clean” which indicates that there is no uncommitted work left to Git push to the remote branch.
When you’re satisfied with the status of your local branch, it’s time to Git push your changes to the remote branch.
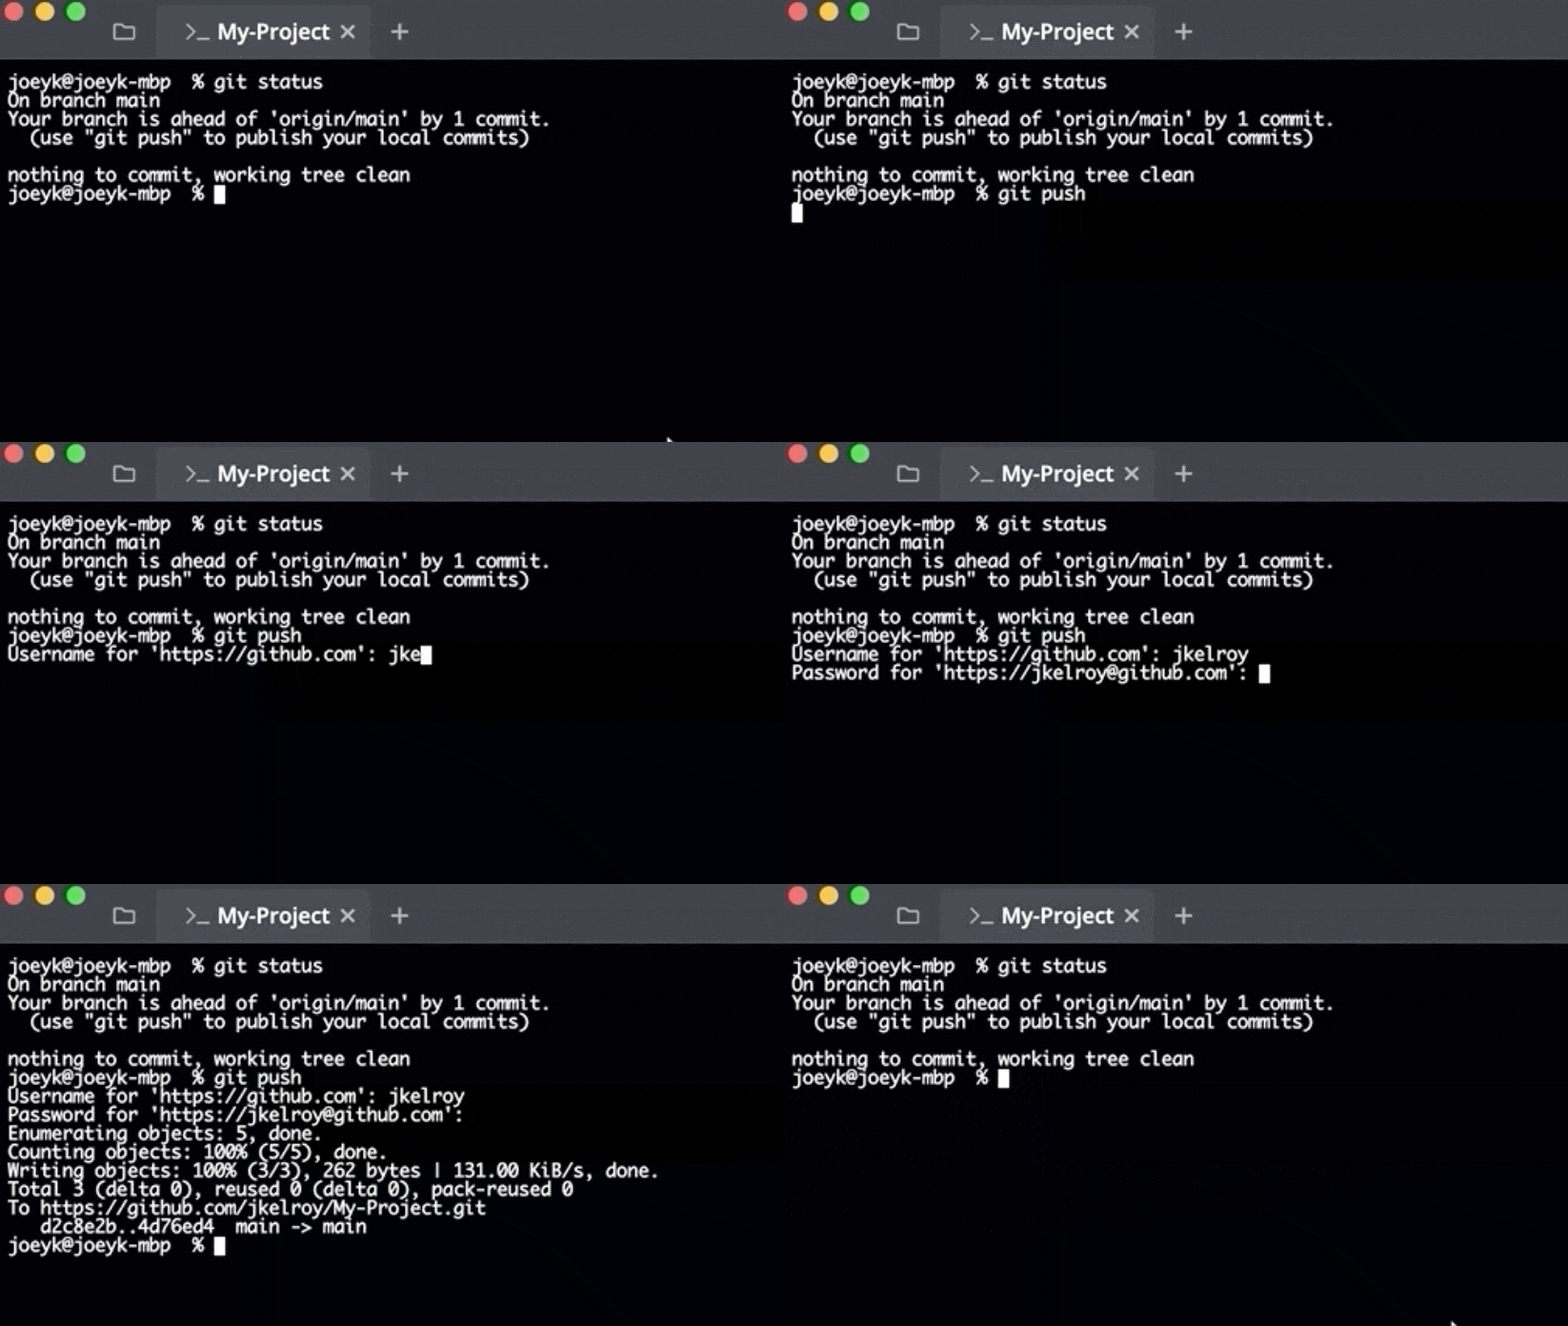
If you have already set the upstream remote for this branch, the Git push command is the only action you need to run. The benefit to setting a default upstream branch is that it eliminates the step in the pushing process that requires you to select which branch you want to push to each time. If this is the process you’ve elected to follow and you’ve set an upstream branch, simply run git push to push your local branch to the remote.
Because the Git repository in this example is using HTTPS, we must also fill out the remote username and password to authenticate. Once the username and password are accepted, all local commits are pushed to the remote branch.
It is important to note however, that many developers would just as soon not set a default branch, preferring instead to specify to which branch they are pushing each time. This is considered by some to be a more mindful process that promotes clean remote repositories and avoids the hassle that often comes with setting and switching upstreams.
If you fall in the camp of not setting an upstream, you can simply tell Git which remote and branch you want to use each time you push using:
git push <remote> <branch-name>
How to Git Push a Branch to Remote with a Git GUI
To push a branch in GitKraken Client, checkout the desired branch and then simply select the Push button in the toolbar.
Alternatively, there are two other ways to Git push a remote branch:
- Use the command palette with the keyboard shortcut
command/ctrl + Pand then type “Push”. - Right-click the branch from the central graph and select Push from the context menu.
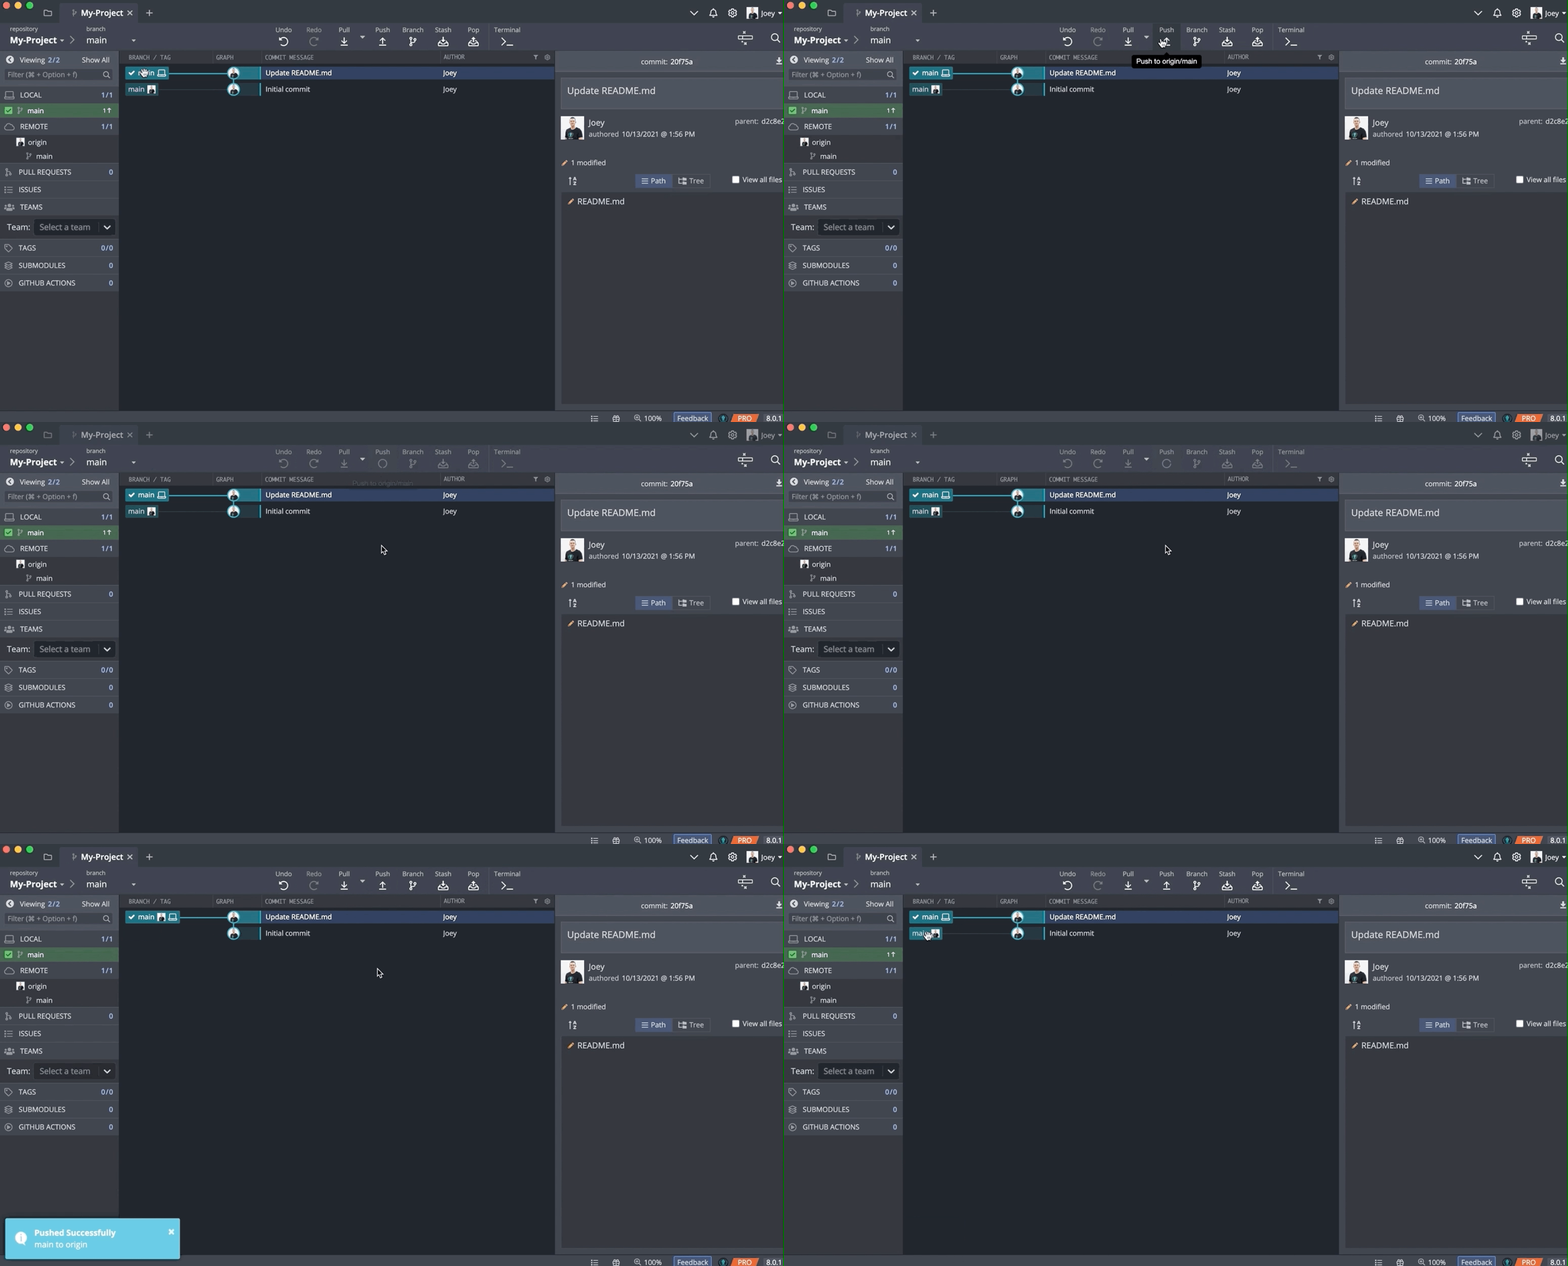
In the example below, the GitHub integration is used as authentication to work with the remote over HTTPS. This makes it so you don’t have to enter your GitHub account information every time you interact with the remote repo in GitKraken Client.
GitKraken Client identifies local files with a laptop icon next to the branch name. In this example, you can see that the local branch “main” has a commit titled “Update README.md” that has not been pushed to the remote yet.
ProTip: before pushing, make sure that there is no WIP node indicating that changes still need to be committed.
When you’re ready to push, select the Push button from the top toolbar. Once the push is finished, the local and remote branch will point to the same commit, and GitKraken Client will show a Pushed Successfully message.
Don’t have an upstream set already? Not to worry, GitKraken Client has your back. GitKraken Client will prompt you and ask what remote and branch you want to push your local changes to.

As you can see in this example, by default, the name of your local branch is auto-filled making it easy to find later in your remote repository. It can be left as is, or you can choose to enter a new remote branch name. Select Submit to finish the push.
How to Git Push a Branch to a Different Remote Upstream
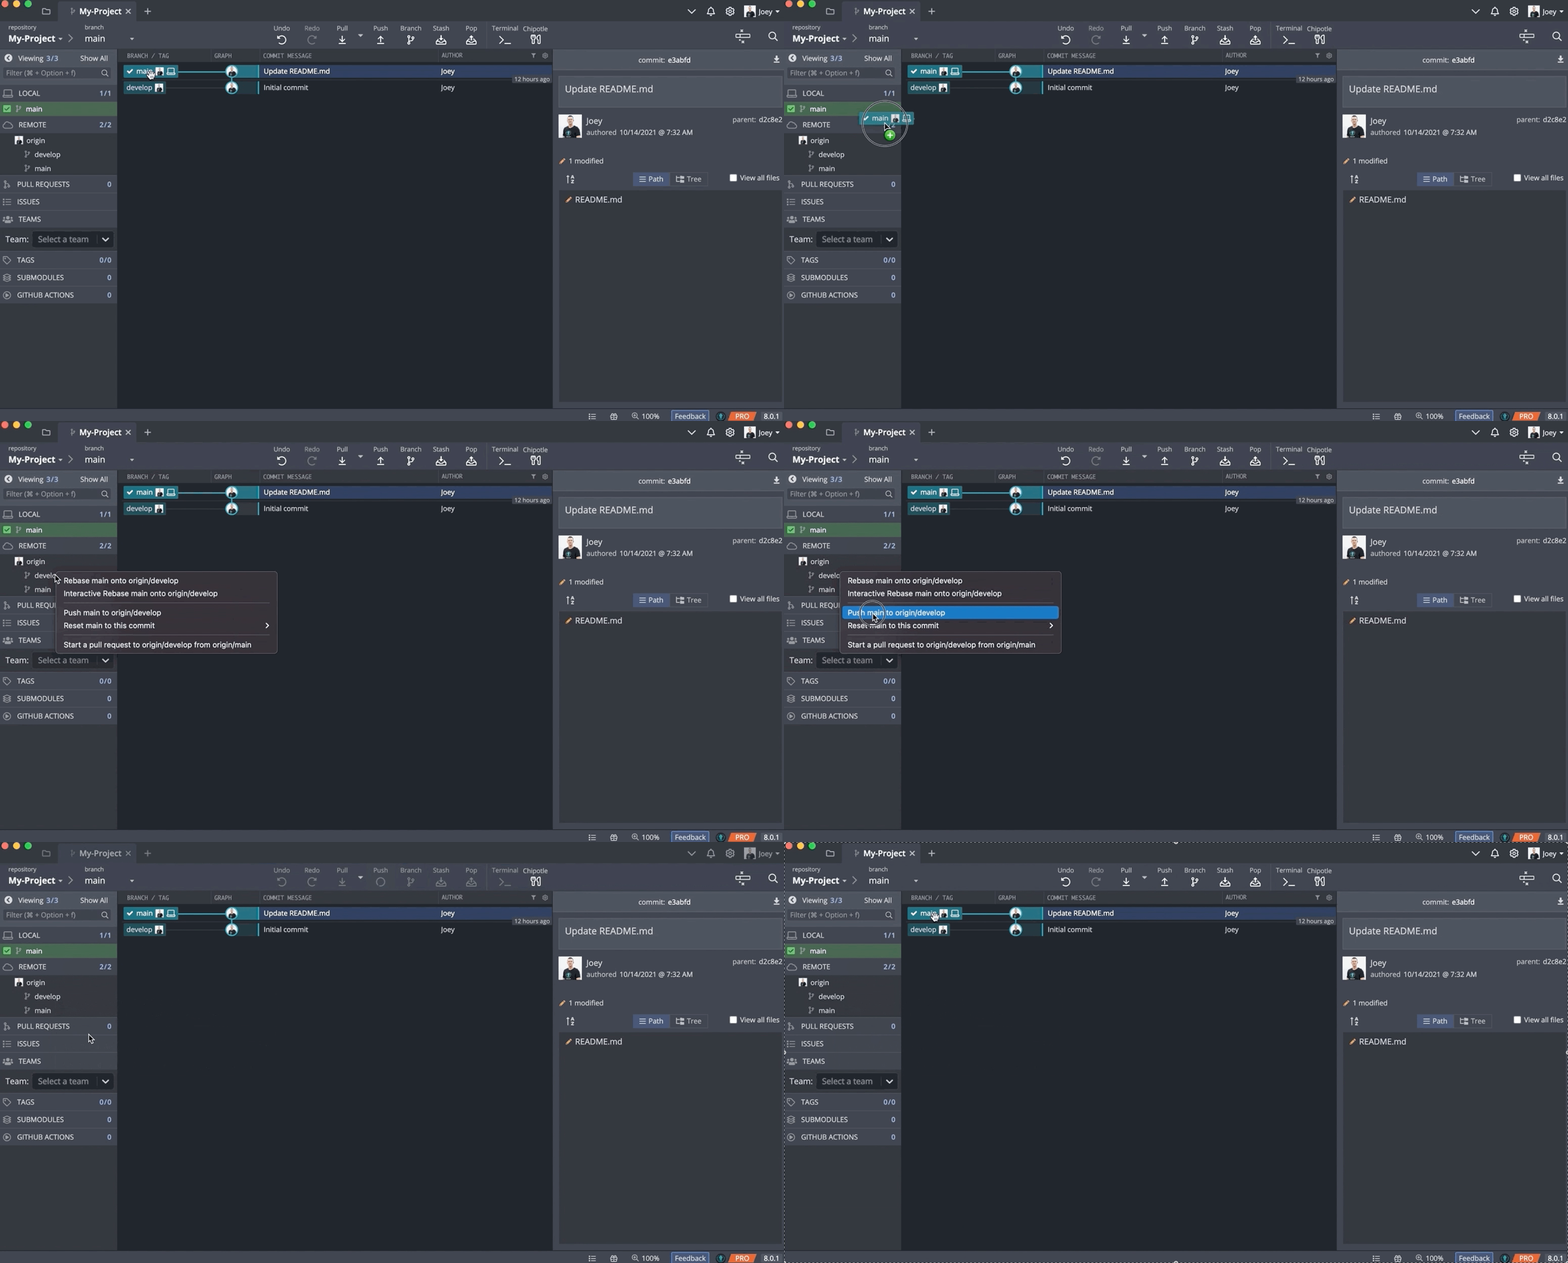
Sometimes, you will need to Git push to a remote branch that is not currently set as the upstream. If this is a special case and you only want to push your local branch to a specific remote once, simply drag-and-drop the local branch onto the desired remote branch and select push from the automatically generated menu.
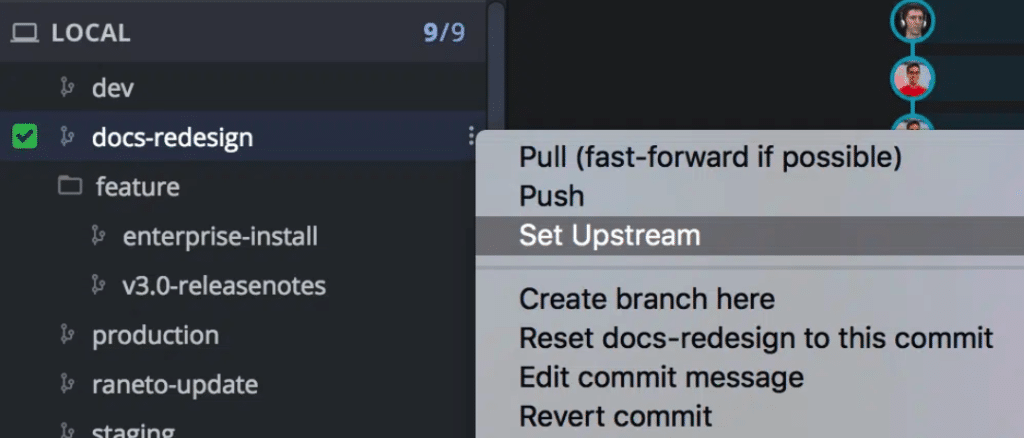
If you want to change the default upstream to a different remote branch, simply right-click your desired branch and select Set Upstream.
Git Pull Before You Git Push
When collaborating with others, it is usually best practice to perform a Git pull before pushing. This will update the local branch with any changes others have pushed to the remote branch. If changes exist on the remote that conflict with the local changes, they can be resolved locally to avoid creating conflicts on the remote.
As anyone that’s ever made that mistake and pushed prematurely knows, trying to untangle and debug a merge conflict can be a major headache and requires considerable time investment from you and your team. GitKraken Client can help you avoid this mistake and others like it with its incredibly intuitive Git for Teams functionality. The team view on the left side of the commit graph provides warnings when files are being worked on by more than one team member at the same time. Plus, interactive GitHub pull request management and a variety of issue tracking integrations are just some of the reasons GitKraken Client is trusted by tens of thousands of organizations worldwide.
Want to help your team spend less time fixing tedious problems and more time writing amazing code? Try GitKraken Client’s Git for Teams features to level up your productivity!
Using the intuitive GitKraken Client makes Git easy to understand for beginners and more powerful for Git experts. Complete with drag-and-drop functionality, legendary UX, and powerful visualization tools, GitKraken Client can take your Git workflow to the next level.
 GitKraken MCP
 GitKraken Insights
 Dev Team Automations
 AI & Security Controls